How to Attach Headboard to Bed Frame in Easy DIY Guides
Are you looking to elevate the look and feel of your bedroom with a beautifully attached headboard, but unsure where to start? Don’t be worry! This article is your comprehensive guide to tackling the task with confidence. From the challenge of choosing the right hardware to the solution of ensuring a secure attachment, we’ve got you covered every step of the way.
In this guide, we’ll break down the process of attaching a headboard to your bed frame, addressing common concerns such as compatibility with different materials and stability over time. Whether you’re dealing with a wooden or metal bed frame, we’ll provide detailed solutions to ensure a seamless attachment that enhances both the aesthetic appeal and functionality of your bedroom.
So, if you’re ready to transform your sleeping space into a stylish sanctuary, join us as we navigate the ins and outs of headboard attachment. Let’s get start!
Step-by-guide: How to Attach Headboard to Bed Frame
How to Attach a Headboard to a Metal Bed Frame
Hey there, DIY enthusiasts! Ready to give your bedroom a stylish upgrade? Let’s dive into the world of headboard attachment and transform your metal/hybrid bed frame into a cozy haven. Here’s your detailed guide:
1. Gather Your Tools:
Before you begin, make sure you have all the necessary tools at your disposal:
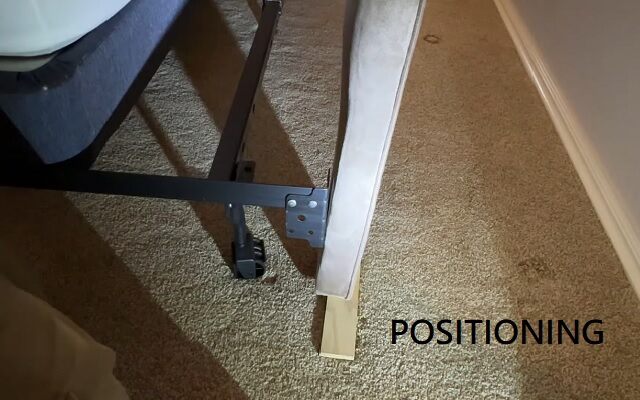
2. Find Your Perfect Position:

Take a moment to visualize where you want your headboard to sit. Place it against the wall at the head of your bed frame, ensuring it’s centered and at the desired height. Use a level to ensure it’s perfectly straight.
3. Locate Mounting Holes:
Most metal bed frames come with pre-drilled holes for attachment. Locate these holes on the bed frame. If your headboard has pre-drilled holes as well, align them with the ones on the bed frame. If not, position the headboard against the bed frame in the desired location, ensuring the holes on the headboard align with the ones on the frame.
4. Insert Hardware:
With your headboard and bed frame properly aligned, it’s time to insert the hardware. Place screws or bolts through the mounting holes on the headboard and into the corresponding holes on the bed frame. If you’re using washers, place them between the screw heads/bolts and the headboard to provide additional support.
5. Secure and Tighten:
Once the hardware is in place, grab your screwdriver or drill and start tightening those screws or bolts. Work your way around the headboard, ensuring each screw/bolt is securely fastened. Be careful not to overtighten, as this could damage the metal.
6. Test for Stability:
Give your newly attached headboard a gentle shake to test its stability. It should feel firm and secure against the bed frame. If you notice any wobbling or loosening, go back and tighten the screws/bolts as needed.
7. Add the Finishing Touches:
If your headboard came with decorative caps or covers for the mounting hardware, now’s the time to attach them. These finishing touches will not only conceal the screws/bolts but also give your headboard a polished look.
Congratulations, DIY champion! You’ve successfully attached your headboard to your metal bed frame, turning your bedroom into a stylish retreat.
How to Attach a Headboard to a Wooden Bed Frame
Hey there, DIY aficionados! Ready to level up your bedroom decor game? Let’s embark on a journey to attach that gorgeous headboard to your wooden bed frame. Here’s your detailed roadmap:
1. Gather Your Tools:
Before you begin, make sure you have all the necessary tools at your disposal. You’ll need:
-
- A screwdriver or drill (depending on the type of screws/bolts)
- Screws or bolts (ensure they’re appropriate for your headboard and bed frame)
- Washers (optional, but recommended for added stability)
- A level (to ensure your headboard is straight)
2. Find Your Perfect Position:
Take a moment to envision the ideal placement of your headboard. Place it against the wall at the head of your bed frame, making sure it’s centered and at the desired height. Use a level to ensure it’s perfectly straight.
3. Locate Mounting Holes:
Now it’s time to hunt for those mounting holes! Most headboards and bed frames come with pre-drilled holes for attachment. Locate these holes on both the headboard and the bed frame. If your headboard or bed frame doesn’t have pre-drilled holes, you’ll need to mark and drill them yourself. Measure carefully to ensure accuracy.
4. Align and Prepare for Attachment:
Once you’ve located the mounting holes, align the headboard with the bed frame. If your headboard has pre-drilled holes, line them up with the corresponding holes on the bed frame. If not, position the headboard against the bed frame in the desired location, ensuring the holes on the headboard align with the ones on the frame.
5. Insert Hardware:
With your headboard and bed frame properly aligned, it’s time to insert the hardware. Place screws or bolts through the mounting holes on the headboard and into the corresponding holes on the bed frame. If you’re using washers, place them between the screw heads/bolts and the headboard to provide additional support.
6. Secure and Tighten:
Once the hardware is in place, grab your trusty screwdriver or drill and start tightening those screws or bolts. Work your way around the headboard, ensuring each screw/bolt is securely fastened. Be careful not to overtighten, as this could damage the wood or strip the screws.
7. Test for Stability:
Give your newly attached headboard a gentle shake to test its stability. It should feel firm and secure against the bed frame. If you notice any wobbling or loosening, go back and tighten the screws/bolts as needed.
8. Add the Finishing Touches:
If your headboard came with decorative caps or covers for the mounting hardware, now’s the time to attach them. These finishing touches will not only conceal the screws/bolts but also give your headboard a polished look.
Congratulations, DIY maestro! You’ve successfully attached your headboard to your wooden bed frame, transforming your bedroom into a cozy sanctuary of style and comfort.


Pingback: How To Make A Wood Headboard In 7 Easy DIY Steps - Bedding Expertise