Upgrade Existing Bottom Storage Bed with Plywood Top IN 5 Easy DIY Steps
Upgrading your existing bottom storage bed with a plywood top is a smart DIY project that enhances both the functionality and durability of your bed. A plywood top provides a solid, sturdy surface, perfect for supporting your mattress while offering additional stability to the bed frame. This upgrade not only improves the structural integrity of your bed but also gives it a fresh, modern look. Whether you’re looking to extend the life of an older bed or simply want to improve your bedroom’s aesthetics, adding a plywood top is a cost-effective solution that can be customized to meet your specific needs. Let’s get started on upgrade existing bottom storage bed with plywood top.
Benefits of Upgrading Your Storage Bed
Upgrading your existing bottom storage bed with a plywood top offers several significant benefits, making it a worthwhile DIY project. Whether you’re looking to enhance the durability of your bed or simply want to give it a fresh, modern look, adding a plywood top can achieve these goals and more. Below, we’ll explore the key benefits in detail.
1. Enhanced Durability
- Increased Strength: Plywood is known for its strength and durability. By upgrading your storage bed with a plywood top, you are reinforcing the structure, making it more robust and capable of supporting heavier loads. This is particularly beneficial if your current bed shows signs of sagging or wear.
- Longevity: A plywood top extends the life of your bed by providing a solid, stable surface that resists warping and damage over time. This upgrade ensures that your bed will last for years to come, reducing the need for costly replacements.
2. Improved Storage Accessibility
- Better Organization: The flat, sturdy surface provided by a plywood top makes it easier to organize and access items stored underneath the bed. Unlike a sagging or uneven surface, plywood allows you to slide storage bins or drawers in and out with ease.
- Optimized Space: With a plywood top, you can maximize the storage potential of your bed. The added strength allows you to store heavier items without worrying about damaging the bed frame, making your storage space more versatile.
3. Aesthetic Appeal
- Customizable Surface: Plywood offers a blank canvas for customization. You can stain, paint, or cover the plywood with fabric to match your bedroom décor. This allows you to personalize the look of your bed, making it a stylish centerpiece in the room.
- Sleek and Modern Look: A plywood top gives your bed a clean, modern appearance. The smooth surface and sharp edges of plywood can transform an old, worn-out bed into something that looks brand new and contemporary.
4. Cost-Effective Solution
- Affordable Upgrade: Compared to purchasing a new storage bed, upgrading with plywood is a cost-effective solution. Plywood is relatively inexpensive, yet it offers significant improvements in both durability and appearance.
- DIY Savings: By undertaking this upgrade yourself, you save on labor costs that would otherwise be spent on professional repairs or replacements. This makes the project not only affordable but also rewarding as a personal achievement.
5. Environmentally Friendly Option
- Sustainable Material: Plywood is often made from renewable wood sources, making it a more sustainable choice compared to other materials. By upgrading your existing bottom storage bed with a plywood top, you’re also making an environmentally conscious decision to extend the life of your furniture rather than replacing it.
Upgrading your storage bed with a plywood top offers a blend of practicality and style. It enhances the bed’s functionality, provides a durable and attractive surface, and can be tailored to suit your specific needs and tastes—all without breaking the bank. Whether you’re looking to improve the usability of your storage space or simply refresh the look of your bedroom, this upgrade is a highly effective solution.
Materials and Tools Needed
Before you begin the process of upgrading your existing bottom storage bed with a plywood top, it’s essential to gather all the necessary materials and tools. Having everything on hand will ensure a smooth and efficient DIY experience. Below is a comprehensive list of what you’ll need for this project, along with some tips on selecting the best materials.
Materials
- Plywood Sheet
- Size and Thickness: Choose a plywood sheet that matches the dimensions of your bed. The thickness should ideally be between ½ inch to ¾ inch, depending on the weight you expect the bed to support. Thicker plywood offers more durability but may add extra weight.
- Type: Opt for high-quality plywood, such as birch or oak, which provides a smooth surface and excellent strength. Avoid using low-grade plywood, as it may contain voids or weak spots that could compromise the bed’s stability.
- Sandpaper
- Grit: Select sandpaper with a grit range of 120 to 220 for smoothing the plywood edges and surface. A finer grit will ensure a polished finish, especially if you plan to stain or paint the plywood.
- Wood Stain or Paint (Optional)
- Color Options: If you want to customize the look of your plywood top, consider using wood stain or paint. Stains enhance the natural wood grain, while paint offers a broader range of colors to match your room’s décor.
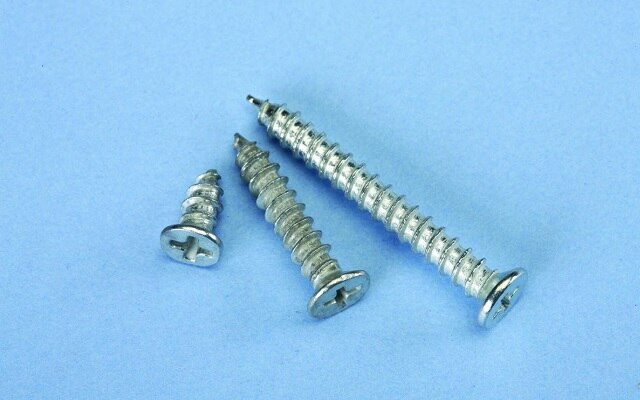
- Screws or Nails
- Size: Use screws or nails long enough to securely attach the plywood to the bed frame without piercing through the other side. Typically, 1½-inch screws or nails work well for this purpose.
- Material: Choose screws or nails made from rust-resistant materials like stainless steel or brass, especially if your bed frame is made of wood. This will ensure the hardware lasts as long as the plywood top.
- Wood Adhesive
- Type: A high-strength wood adhesive can provide additional bonding between the plywood and the bed frame. Look for an adhesive that dries clear and offers strong, long-lasting support.
- Edge Banding (Optional)
- Purpose: Edge banding is a thin strip of material that covers the raw edges of plywood, giving it a finished, professional look. It’s particularly useful if the plywood edges will be visible. Available in wood veneer, plastic, or melamine, edge banding can be glued or ironed on.
Tools

- Measuring Tape
- Accuracy: A reliable measuring tape is crucial for ensuring that the plywood is cut to the correct dimensions. Accurate measurements will help prevent gaps or overhangs that could affect the bed’s appearance and functionality.
- Circular Saw or Table Saw
- Cutting Precision: Both circular and table saws can be used to cut the plywood to size. A circular saw is more portable, while a table saw offers greater precision for straight cuts. Make sure the saw blade is sharp to achieve clean, smooth edges.
- Power Drill

Versatility: A power drill is essential for driving screws into the plywood and bed frame. It can also be used to create pilot holes, ensuring the wood doesn’t split during assembly. A drill with adjustable speed settings is ideal for this project.
- Screwdriver
- Hand Tool: While a power drill is more efficient, a manual screwdriver can be used for finer adjustments or in tight spaces where a drill may not fit.
- Paintbrush or Roller (Optional)
- Application Tools: If you plan to stain or paint the plywood, use a high-quality paintbrush or roller to achieve a smooth, even coat. Foam rollers are particularly effective for applying paint without leaving brush marks.
Having the right materials and tools is the foundation of a successful DIY project. By preparing in advance and selecting high-quality items, you ensure that your upgrade will not only look great but also stand the test of time. The next step in this process is to follow a detailed, step-by-step guide that will walk you through the actual construction and installation of the plywood top.
Step-by-Step Guide to Upgrading Your Storage Bed
Upgrading your existing bottom storage bed with a plywood top is a rewarding DIY project that can significantly enhance your bed’s functionality and appearance. This guide will walk you through each step, from initial measurements to the final installation, ensuring that your project is successful and stress-free.
Step 1: Measure and Plan
- Assess Your Bed Frame: Begin by thoroughly inspecting your current bed frame. Take note of any irregularities, such as uneven surfaces, loose joints, or damaged areas that might need attention before you add the plywood top. Understanding the condition of your bed will help you plan the upgrade more effectively.
- Measure the Bed Surface: Use a measuring tape to determine the exact dimensions of the surface where the plywood will be placed. Measure the length and width carefully, taking into account any overhangs or trim that may affect the fit of the plywood. Accuracy is crucial to ensure that the plywood fits perfectly without gaps or overhangs.
- Decide on the Plywood Thickness: Based on your measurements and the bed’s current condition, decide on the thickness of the plywood. A thickness of ½ inch to ¾ inch is typically sufficient for most storage beds, providing a good balance between strength and weight. If the bed frame is weak, opt for thicker plywood to reinforce the structure.
- Plan for Accessibility: Consider how you will access the storage space beneath the bed after the plywood top is installed. If the storage area is frequently used, you might want to incorporate a hinge system that allows the plywood top to lift up easily. This planning step is essential for maintaining the functionality of the storage bed.
Step 2: Cutting the Plywood
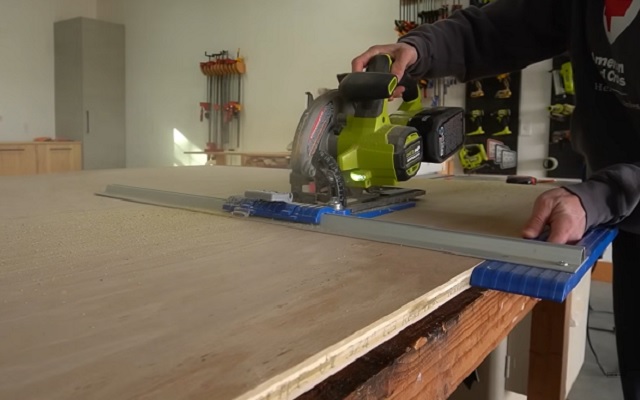
- Mark the Cutting Lines: Once you’ve measured and planned, transfer the dimensions onto the plywood sheet. Use a straight edge to draw precise cutting lines, ensuring the dimensions match those of your bed frame exactly. Double-check your measurements before making any cuts to avoid costly mistakes.
- Prepare the Cutting Area: Set up a stable workbench or sawhorses to support the plywood while cutting. Make sure the area is well-lit and free of obstructions. If you’re working indoors, consider laying down a drop cloth to catch any sawdust.
- Cut the Plywood: Using a circular saw or table saw, carefully cut along the marked lines. If you’re using a circular saw, guide it slowly along the straight edge to maintain accuracy. For long, straight cuts, a table saw can provide greater precision. Make sure to wear safety goggles and ear protection while cutting.
- Smooth the Edges: After cutting the plywood, use sandpaper to smooth out any rough edges. Start with medium-grit sandpaper (around 120 grit) and finish with fine-grit sandpaper (220 grit) for a polished edge. This step ensures that the plywood top looks professional and feels smooth to the touch.
Step 3: Preparing the Plywood
- Sanding the Surface: Before attaching the plywood to the bed frame, sand the entire surface to remove any rough spots or splinters. Sanding also helps to open up the wood grain if you plan to stain or paint the plywood. For a smooth finish, start with medium-grit sandpaper and progress to fine-grit sandpaper.
- Applying Wood Stain or Paint (Optional): If you want to customize the appearance of the plywood top, now is the time to apply wood stain or paint.
- Staining: Apply a wood stain of your choice using a clean cloth or foam brush, following the grain of the wood. Allow the stain to penetrate the wood for a few minutes before wiping off any excess. For a deeper color, apply additional coats, allowing each coat to dry fully before adding the next.
- Painting: If you prefer paint, use a primer first to ensure good adhesion, then apply your chosen paint color using a paintbrush or roller. Multiple thin coats will give you a smooth, even finish without brush marks. Be sure to let each coat dry completely before applying the next one.
- Edge Banding (Optional): For a polished look, you can apply edge banding to the exposed edges of the plywood. This step is optional but recommended if the edges will be visible.
- Application: Measure and cut the edge banding to fit the length of each edge. If using adhesive edge banding, apply it by heating the adhesive with an iron, pressing the banding firmly onto the edge, and then trimming any excess with a utility knife. Sand the edges lightly for a smooth finish.
Step 4: Attaching the Plywood Top

- Position the Plywood on the Bed Frame: Carefully place the plywood top onto the bed frame, ensuring it is centered and aligned with the edges of the frame. If the plywood is slightly larger than the frame, you may need to trim it further to achieve a perfect fit.
- Drill Pilot Holes: To prevent the wood from splitting, drill pilot holes through the plywood and into the bed frame. Space the holes evenly around the perimeter of the plywood, typically every 6-8 inches. The pilot holes should be slightly smaller than the screws you’ll be using.
- Apply Wood Adhesive: For added stability, apply a thin layer of wood adhesive to the top edges of the bed frame where the plywood will be attached. The adhesive will create a strong bond between the plywood and the frame, ensuring the top stays securely in place.
- Secure the Plywood with Screws or Nails: Use screws or nails to attach the plywood to the bed frame, driving them through the pilot holes you drilled earlier. If using screws, a power drill will make this step faster and more secure. Make sure the plywood is firmly attached, with no gaps or loose areas.
- Check for Stability: Once the plywood top is attached, check the stability by applying pressure at various points across the surface. The top should feel solid and secure, with no movement or creaking. If necessary, add additional screws or nails to reinforce the attachment.
Step 5: Adding Custom Features (Optional)
- Hinge System for Easy Access: If you want easy access to the storage space beneath the bed, consider adding a hinge system to the plywood top. This allows the top to lift up, making it convenient to store and retrieve items.
- Installation: Choose sturdy hinges designed to support the weight of the plywood. Attach the hinges to the bed frame and the plywood top, ensuring they are aligned correctly for smooth operation. Test the hinges to make sure the top lifts easily and stays open when needed.
- Under-Bed Lighting: For a modern touch, you can add LED strip lighting beneath the bed. This not only adds ambiance to your room but also makes it easier to see inside the storage area.
- Installation: Attach the LED strips along the underside of the bed frame, routing the wires neatly to a power source. Some LED strips come with remote controls, allowing you to adjust the brightness and color to suit your mood.
- Upholstery for a Soft Finish: If you prefer a padded top, consider adding a layer of foam and fabric upholstery to the plywood.
- Application: Cut a piece of foam to match the dimensions of the plywood, then cover it with fabric. Use a staple gun to attach the fabric to the underside of the plywood, pulling it tight to avoid wrinkles. This adds a luxurious feel to the bed and can be customized with different fabrics.
By following these detailed steps, you can successfully upgrade your existing bottom storage bed with a plywood top, resulting in a stronger, more attractive, and functional piece of furniture. Whether you choose to keep the design simple or add custom features, this project offers a practical and stylish solution for enhancing your bedroom.
Also Read: DIY Guide: How to Lower a Bed Frame in 4 Easy Steps
Optional Customizations
Upgrading your existing bottom storage bed with a plywood top is a fantastic way to enhance its durability and functionality. However, if you’re looking to take your DIY project to the next level, there are several optional customizations you can consider. These additions not only improve the practical aspects of your bed but also allow you to tailor it to your specific needs and style preferences.
1. Adding Soft Close Hinges
- Quiet and Convenient Access: Soft close hinges are an excellent addition if you want to make your storage bed easier to use. These hinges allow the plywood top to close gently and quietly, preventing slamming and reducing wear and tear on the bed frame.
- Installation: Choose soft close hinges that are strong enough to support the weight of the plywood top. Install the hinges at the back of the bed frame, ensuring they are evenly spaced for balanced lifting. Test the mechanism to ensure smooth operation, making adjustments as needed.
2. Installing Under-Bed Lighting
- Enhanced Visibility and Ambiance: Adding LED strip lighting underneath your bed can serve both functional and aesthetic purposes. This lighting makes it easier to see inside the storage area, and it also adds a modern, stylish touch to your bedroom.
- Installation: Select LED strips that can be adhered to the underside of the bed frame. Many LED strips come with adhesive backing for easy installation. Attach the strips along the bed’s perimeter, hiding the wires for a clean look. Consider choosing LED lights with adjustable brightness and color settings to customize the ambiance of your room.
3. Incorporating Built-In Charging Ports
- Convenient Power Access: Integrating built-in charging ports into your storage bed is a practical customization, especially if you often charge your devices overnight. This upgrade ensures that your electronics are within easy reach and keeps cables neatly organized.
- Installation: Purchase a power strip with USB ports and attach it to the inside of the bed frame or beneath the plywood top. Route the power cord to an accessible outlet, and use cable management clips to keep the wires tidy. Make sure the power strip is securely attached and positioned for convenient use.
4. Upholstering the Plywood Top
- Comfort and Style: If you want to add a touch of luxury to your storage bed, consider upholstering the plywood top. This customization provides a soft, padded surface that’s comfortable to sit on and visually appealing.
- Application: Start by cutting a piece of foam to match the size of the plywood. Place the foam on top of the plywood, then cover it with fabric of your choice. Secure the fabric by stapling it to the underside of the plywood, pulling it tight to avoid wrinkles. Choose a fabric that complements your bedroom décor, such as velvet for a plush look or linen for a more casual feel.
5. Adding a Headboard or Footboard
- Enhancing the Bed’s Structure: If your storage bed doesn’t already have a headboard or footboard, adding one can enhance both the look and functionality of the bed. A headboard provides a comfortable backrest, while a footboard can help keep bedding in place.
- Installation: Select a headboard or footboard that matches the style of your bed. You can attach these features directly to the bed frame using screws or brackets. If you’re feeling creative, you can even build your own headboard or footboard using matching plywood, adding a cohesive look to the entire bed.
These optional customizations allow you to transform your upgraded storage bed into a truly personalized piece of furniture. Whether you’re looking for added convenience, style, or functionality, these ideas offer endless possibilities to enhance your bed and make it uniquely yours.
Also Read: How to Repurpose a Bed into a Futon: 5 Easy DIY Steps
Maintenance Tips
Once you’ve successfully upgraded your existing bottom storage bed with a plywood top, it’s important to keep it in top condition. Proper maintenance will ensure that your bed remains sturdy, functional, and attractive for years to come. Here are some tips to help you care for your newly upgraded bed.
1. Regular Cleaning
- Dusting: Dust and debris can accumulate on the plywood surface and in the storage compartments underneath. Regularly dust the plywood top using a soft cloth or a microfiber duster to keep it clean. For deeper cleaning, use a slightly damp cloth, followed by a dry cloth to remove any moisture.
- Vacuuming: If your storage bed includes upholstered surfaces or if you’ve added upholstery to the plywood top, use a vacuum cleaner with an upholstery attachment to remove dust and dirt. This will help maintain the fabric’s appearance and prevent allergens from building up.
2. Protecting the Plywood Surface
- Avoiding Moisture: Plywood is susceptible to damage from moisture, which can cause warping or staining. To protect the surface, avoid placing drinks or other liquids directly on the plywood top. If you plan to use the bed as a sitting or working area, consider placing a protective mat or coaster on the surface to prevent spills.
- Using Furniture Polish: Applying a furniture polish or wood conditioner can help maintain the plywood’s finish and protect it from wear. Choose a polish that’s appropriate for the type of stain or paint used on the plywood. Apply the polish with a soft cloth, following the wood grain, and buff to a shine.
3. Inspecting and Tightening Hardware
- Checking Screws and Nails: Over time, the screws or nails securing the plywood top to the bed frame may loosen. Periodically inspect the hardware to ensure it remains tight and secure. Use a screwdriver or hammer to tighten any loose screws or nails, preventing the plywood from shifting or becoming unstable.
- Maintaining Hinges: If you’ve added a hinge system to the plywood top, regularly check the hinges for signs of wear or loosening. Tighten any loose screws and apply a drop of lubricant to the hinge joints to keep them operating smoothly.
4. Refinishing the Plywood Top
- Reapplying Stain or Paint: If the plywood surface becomes scratched or faded over time, you can refresh its appearance by reapplying stain or paint. Start by lightly sanding the surface to remove any old finish or rough spots. Then, apply a new coat of stain or paint, following the same process used during the initial application.
- Edge Banding Touch-Ups: If you’ve used edge banding, it may occasionally need touch-ups, especially if it begins to peel or crack. Reapply edge banding as needed, using the same technique as before, to maintain a clean, finished look.
5. Handling Wear and Tear
- Repairing Scratches and Dents: Minor scratches or dents in the plywood can be repaired using wood filler or a wood touch-up marker. Fill in any scratches with a matching wood filler, sand smooth once it’s dry, and then reapply stain or paint. For small dents, use a touch-up marker to blend the affected area with the surrounding wood.
- Replacing Worn Components: If any part of the bed frame or plywood top becomes damaged beyond repair, consider replacing the affected components. Plywood is relatively inexpensive, so replacing a damaged top is a simple way to restore the bed’s appearance and functionality.
By following these maintenance tips, you can keep your upgraded storage bed looking great and functioning well for many years. Regular care will protect your investment and ensure that your DIY efforts continue to pay off over time.
Conclusion
Upgrading your existing bottom storage bed with a plywood top is a practical and stylish way to enhance your bedroom. This DIY project is not only affordable but also adds durability and functionality to your bed. By following the steps outlined, you can easily transform your storage bed into a more sturdy and attractive piece of furniture. Whether you choose to keep it simple or add custom features, this upgrade is a worthwhile investment in your home. Regular maintenance will ensure that your newly upgraded bed continues to serve you well for years to come.
Visit Bedding Expertise for more valueable information on bedding topics!

Pingback: How To Make A Cardboard Bed Frame In 5 Easy DIY Steps - Bedding Expertise
Pingback: Upgrade Bottom Storage Bed With Plywood Top: A Practical Guide For DIY Lovers - Bedding Expertise
Pingback: What Is A Marshmallow Bed Frame? A Comprehensive Guide - Bedding Expertise